Translate climbing into home workouts
By Adeline Wright
─
Quarantine has changed everything
I’ve been an indoor climbing coach for a little over 5 years, and always operated in a gym setting. In all that time I’ve had to adapt to the needs of many clientele including physical barriers, language barriers, learning disabilities, time constraints, and fear of heights. I worked with steady clients ranging 4-70 yrs old; all who have varying personalities. I thought I’d crossed every bridge, but this was the first time I had to teach without access to a climbing wall, gym equipment, or in-person interaction. This called for a shift in my usual program and approach to climbing.
Getting technical
First I had to figure out how to teach movement without the ability to apply it directly on the wall. Fortunately, I’m a very technical climber, so I thought about climbing from that perspective. If you break it down into simple movements like contemporary dance then
consider the muscles involved, you can replicate it as an accessible exercise. Some movements were easy to break down, like toehooks. Others took more consideration and a bit of creativity, like movements for slab climbing.
One simple way to build the strength for toehooks is tying a wide resistance band to the leg of your bed or heavy furniture. Then sit on the floor facing it and wrap the band around the knuckles of one foot. Flex your toes against the band as much as you can using just your shins 8 times for 3 reps on each foot. It doesn’t seem like much, but this exercise gets tougher with each repetition.
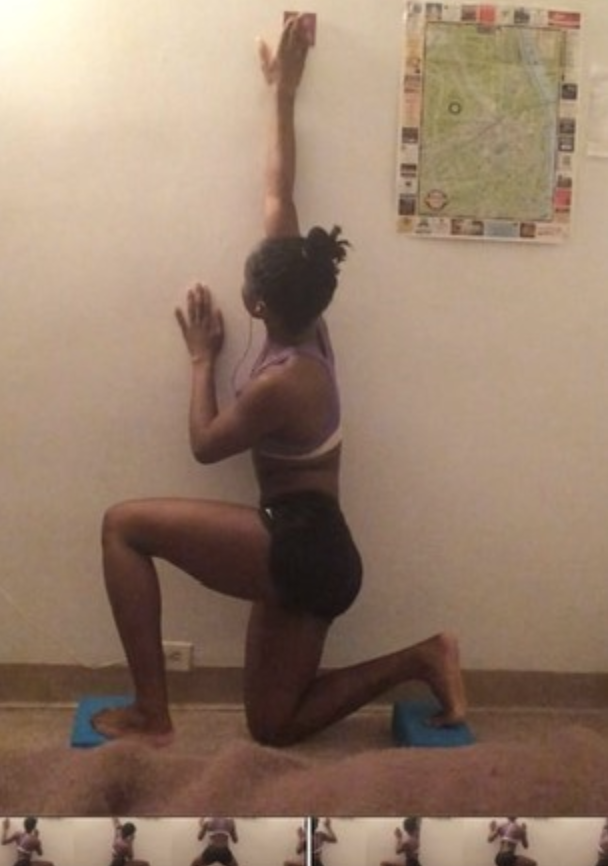
Specific needs
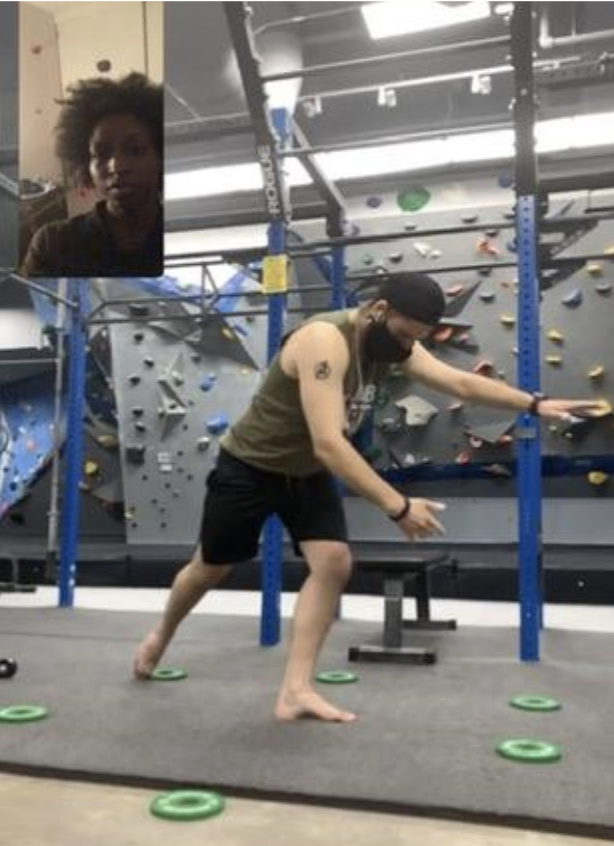
The process became even simpler when fine-tuning a curriculum based on the client’s needs. If someone has weak knees or poor balance, I can first build that up and then relate it to climbing as they improve. Then the transition into climbing-specific exercises is seamless. One of my favorite balance exercises that doubles as a flagging practice is toe taps. Pick 6 flat place holders and put them on the ground to form a large even circle with a 2-foot radius. While standing in the middle on 1 foot, tap all 6 placeholders with your big toe. Complete 8 full circles while alternating feet. I love this exercise because it covers an inside flag, normal flag, backflag, and doesn’t require any gym equipment.
Application to all of my coaching
I found that I love going back to basics, meaning general body awareness and building muscle memory for stability in all parts of the body. So when I coach in person now, be it for a private client or the youth teams at Central Rock Manhattan, I teach movement off the wall and then have them apply it on the wall. Its had tremendous success thus far and leaked into other pieces of the clients’ lives. When someone I’ve taught is climbing and need beta for a project, I no longer shout out a climbing move or typical beta. Instead I’ll yell out an exercise we’ve done together and see so much more understanding click in their minds.
Accessibility
For all of my at-home classes thus far, I’ve been able to use household items such as books, a broomstick, umbrella, belt, towel, furniture, doorway, t-shirt, wall space, floor space, and post-its. Occasionally, someone will have resistance bands, a yoga block, or a place to hang from which allows me more room to work.
Bringing climbing back to the gym safely
I. Social Distancing
As we transition back into some sense of normalcy, there are some safety standards we have to consider. CDC guides are in place such as constant use of hand sanitizer, limited capacity at indoor facilities, and wearing masks as much as possible. Until the vaccine has been given to at least 80% of the population, all of my training sessions and in-person private lessons will be at my gym either before or after work. I’ve limited all of my travel to either going to work, occasional trips to other gym for training, or massive food hauls for the household.
II. Avoiding Injury
The last thing I want people to do is jump back into climbing firing on all cylinders. Our bodies aren’t as prepared to resist gravity, so we have to build up strength to avoid putting a strain on our fingers and joints. I prepared a 30-day program that touches on balance, thorough warmups, conditioning, endurance, reviewing technique, and patience. I work with most of my clients once a week, so I included exercises to do on their own as extra credit.
It’s been interesting to deconstruct climbing this way and fine tune the pieces people struggle with. It’s definitely elevated my teaching ability and understanding of the sport. Try my toe taps exercises at home and show me your progress on social media! Tag me and use the title as a hashtag #translateclimbingintohomeworkouts
Climbing Endurance
By Adeline Wright
Endurance is an important factor of climbing that concerns lead climbers, top ropers, competition boulderers, and average gym climbers alike. Completing a crux move alone is not as impressive as finishing the entire climb. I’ve already discussed how to build aerobic capacity off the wall, so as promised: here are some climbing exercises you can do to build your endurance.
Laps on the auto-belay
Whether you’re a rope climber or not, this will benefit you. The most well-rounded and fit climber has both the endurance of a lead climber and the strength of a boulderer. The best part is you don’t need to find a belayer.
Start the timer
I prefer to climb using any holds I want for the way up and the downclimb, that way I get to decide my movements and keep it as symmetrical as possible. If you need to rest, do it on the wall with straight arms. Make sure to have a chalk bag around your waist, and a canteen of water within reach on the ground. You can use either a watch on your wrist, a timer on your phone, or the big clock in your gym if it’s within view. Aim to climb for 15 mins straight, then gradually build up to 30 mins over a few weeks.
Intervals
If you’d prefer more direction for your training, pick an auto-belay with at least 2 routes. Make sure one is easy and one is moderately difficult. Climb up the moderately difficult route, and downclimb the easy route. Do this 3 times at a slow controlled pace, 3 times at a fast pace, and 3 more times at a slow pace. You can increase the intensity by downclimbing the harder route instead of the easier one.
Bouldering Exercises
Not everyone has access to an auto-belay. Even if they do, they’d need to be at the gym early or late enough to avoid top rope clinics, team sessions, children without belayers, and the general after-work rush hour. So here are some endurance exercises for the boulder wall.
Traverse
There are a few options here. Based on the layout of your gym, you can either traverse the entire boulder area, a single boulder “island”, the entire gym, or just the top rope wall. Use your best judgement. The idea is to either record how long it takes to complete the traverse and shave off time or mark how far you can traverse in one shot and go further/complete more laps. I find this exercise interesting because some of the holds will change on a weekly basis. The best way to get better at climbing is to climb and build experience. These challenges will teach your body movement that can be applied to a problem you’re stuck on..
Complete the set
Pick a boulder grade that is incredibly easy for you, usually v0-v3. Your goal is to send all the v0’s in the gym. Then all the v1’s in the gym. Then all the v2’s in the gym, so on so forth until you reach just below moderate difficulty. You can take a 2 minute break, if at all, before starting the higher grade. This is definitely the toughest exercise mentioned so far; as you progress you’ll feel more pumped while the movements get increasingly more difficult. This is great because not only do you have to rely on technique, but you also have to adapt to spending your energy strategically to complete the exercise. Learning how to do this is an added benefit on your path to becoming a better climber.
Splash Wall
If your home gym has a splash wall aka a spray wall, you’re all set. This is the OG moon board or tension board. The main difference is you can’t change the incline of the wall and the holds don’t have to be wooden. Make up any circuit you want or follow one put up by the routesetter. If you let your body flow on its own, count how many hand movements you make and build on that. If you follow a circuit, count how many laps you can do and aim to double it over time.
If you haven’t already, invest in a journal or fitness app to record your progress. It’ll be a motivator once you see improvement. If you do even one of these exercises twice a week, you’ll see some results after just two weeks. I suggest working on endurance after your normal climbing session or on your designated training day. Once you’ve picked an exercise, try it out and tell me how day one went on social media! Tag me and use this title as a hashtag #climbingendurance
Ease Back Into Climbing
By Adeline Wright
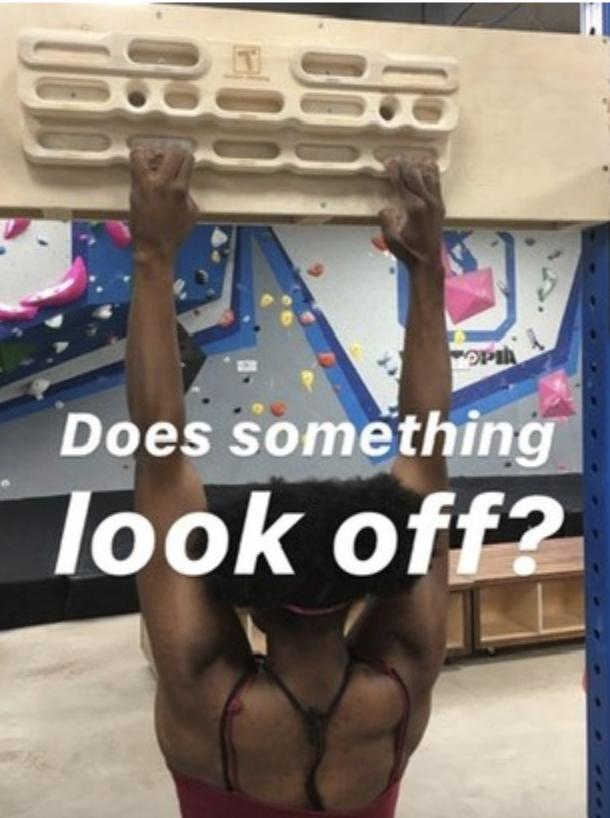
Climbing gyms are finally open and we’re all excited to project again, I can already see the torn ligaments
Take a closer look at my fingers!
This picture was taken back in June 2019, right before I visited a hand specialist for swelling and pain in my middle finger. I tore 2 ligaments on the right side, sprained a ligament on the left side, and had chronic swelling- all on my right middle finger joint. I also learned that two years prior, what I thought was a popped tendon was actually a fracture on that SAME joint. I miraculously healed the first injury on my own by taking a climbing hiatus for 6 months and constantly knitting as self-prescribed physical therapy.
What was the cause of all this trauma, you ask? Pushing my body too far and not taking supplementary training seriously. When I tried moves on harder climbs I could almost fight through it, but I put incredible strain on my fingers which had a domino effect. Small pains that I ignored turned into strains, those developed into small tears which led to imbalance of strength between both hands. As a result I had to overcompensate for the lack of strength in my right hand, which gave rise to new complications in
my left hand. Although I stopped myself before irreparable damage was done, I still needed professional help to recover from the injuries sustained.
Guidance and Education
Outside of going in for appointments twice a week to a physical therapist who focuses on hand injury, I enlisted my friend and movement specialist to realign and balance my body. I learned that antagonist muscles must be trained along with the agonist, or in other words, train to push AND pull. Previously I practiced pullups, campusing, and full crimps constantly. I entirely ignored pushups and the ligaments involved in opening my hand. I also learned to build up muscles around my joints to further protect them, and recruit larger groups of muscles to complete a task. For example, it’s not the best idea to bend in a hinge at your hips to pick something up off the ground. Instead, squat using your entire core, glutes, hamstring, stabilizer muscles in your shins, and quads. When you’re young it sounds miniscule, but as you get older you’ll find it’s easier and easier to throw your back out.
My goal here isn’t to scare you away from climbing, I simply want you to avoid injury! Here are some tips to safely get back to your prime.
Technique over everything
Technique is something you’ll never forget, its muscle memory at this point. Take your time on your climbs and figure out the smartest way to send it. Don’t do pull ups, instead stand up in a way that keeps your arms straight. If your gym offers free technique clinic for members, take a few refreshers.
Build your endurance back up
Endurance is the first to go after a long break from climbing, however it’s the easiest to get back. In a future article I’ll list a few ways to build climbing endurance, so stay tuned!!
Nurse your calluses
Climbing damages your skin, that rings true even after your calluses develop. It’s even worse for outdoor climbers. If you have the energy to keep climbing but your hands are toast, listen to your body. Flappers suck not only because they hurt, but they take a while to heal, and even worse, they
leave you exposed to the outside environment, which will lead to an infection. Let’s not forget we’re still in a pandemic.
Carry a case of skin balm such as Climb On, Joshua Tree or even Burt’s Bees. Rub it on your hands after washing them and call it a day.
Antagonist muscles need love too
In order to achieve efficient physical ability you need to train every muscle equally. One muscle group can’t be neglected over the other, and the same principle applies to the core. The only way to build a strong core is to target all angles, including your obliques, abdominals, and back. If you only build the side that lengthens the muscle or the side that shortens the muscle, neither will have the necessary support.
Warm up
If you weren’t warming up before, now you know better so don’t look back. Have a routine ready based on your plans for the session. This should include a bit of cardio, dynamic stretches and moderate use of resistance bands. Experienced high level climbers will do some fitness before jumping straight on the project, but the average climber should do a short warm up on the wall.
Recovery
Do NOT underestimate the importance of recovery. If you can help it, don’t go crazy and climb for 5 days in a row. A good rule of thumb is no more than 3 days back to back, with 1 day less than the amount of repeat climbing designated to other things. That could be
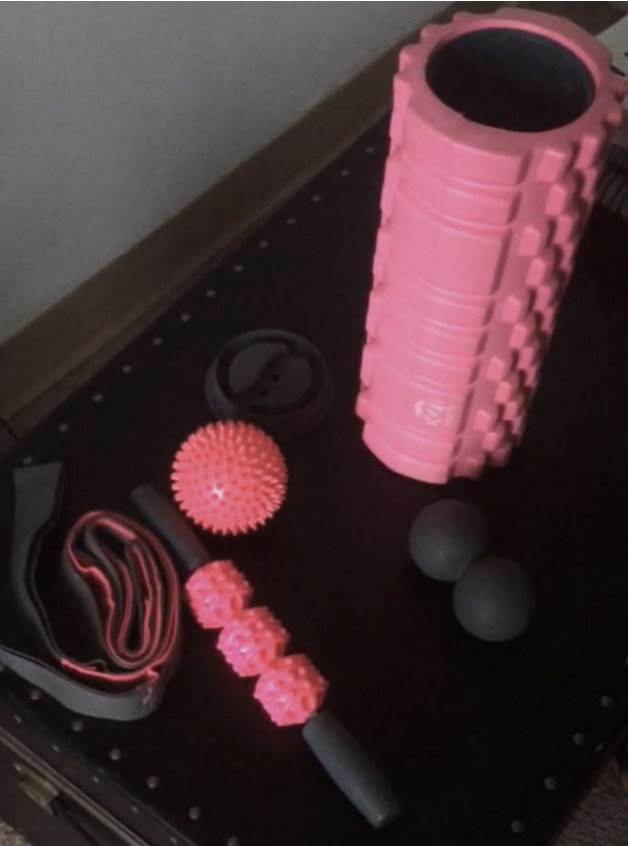
training specific muscle groups while off the wall, doing cardio, working on flexibility, or just doing nothing. Muscle is first broken down and rebuilt over a 24-48hr period. If you overtrain and don’t allow your body the time it needs to recover, then you’ll be setting yourself up for constant injuries. I can’t stress this enough. It’s also important to do some physical therapy using foam rollers etc after a session. You won’t be as sore the next day. If you have financial access to it, massages are another great way to recover.
Vary your finger training
The best way to avoid finger injuries is to train for open handed crimps, and slopers. You also want to climb on varying hold types. Repeating a specific move continuously leads to injury. This is why you take a few minutes break between attempts on a project and if a move doesn’t seem to go after 15 tries, move on and come back another day.
Grades are subjective
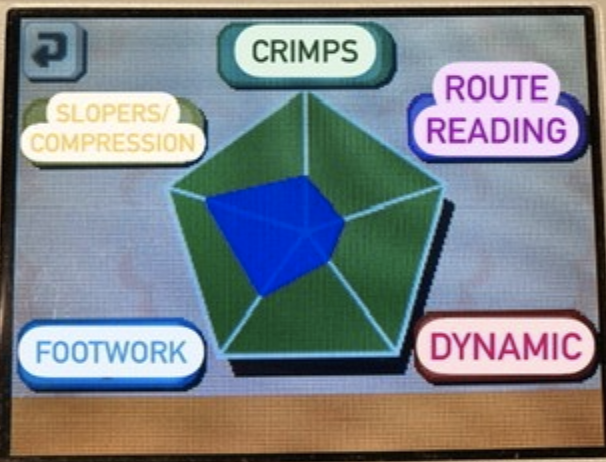
Climbing is supposed to be fun, so make sure that’s your focus. Don’t immediately push yourself, if at all, to send hard. Measure your progress in a less detrimental way. I’m an incredibly competitive person, so if I present myself with a challenge it becomes my sole focus. Sometimes I risk my own safety just to reach the goal. I’ve learned that it’s healthier for me to monitor my progress on types of
climbing styles and movements, then train to build those up specifically. I can monitor my skills as effectively as if I were using a pentagram in a video game.
One of my favorite sayings is “just because you can, doesn’t mean you should”. It’s a warning to think twice before doing anything, especially if there are potential dangers. Keep that in mind the next time you head to the gym! After you’ve given all of these tips a shot, let me know which one was hardest to stick to on social media. Tag me @adyclimbs, @beta_labs, and use this title as a hashtag #easebackintoclimbing